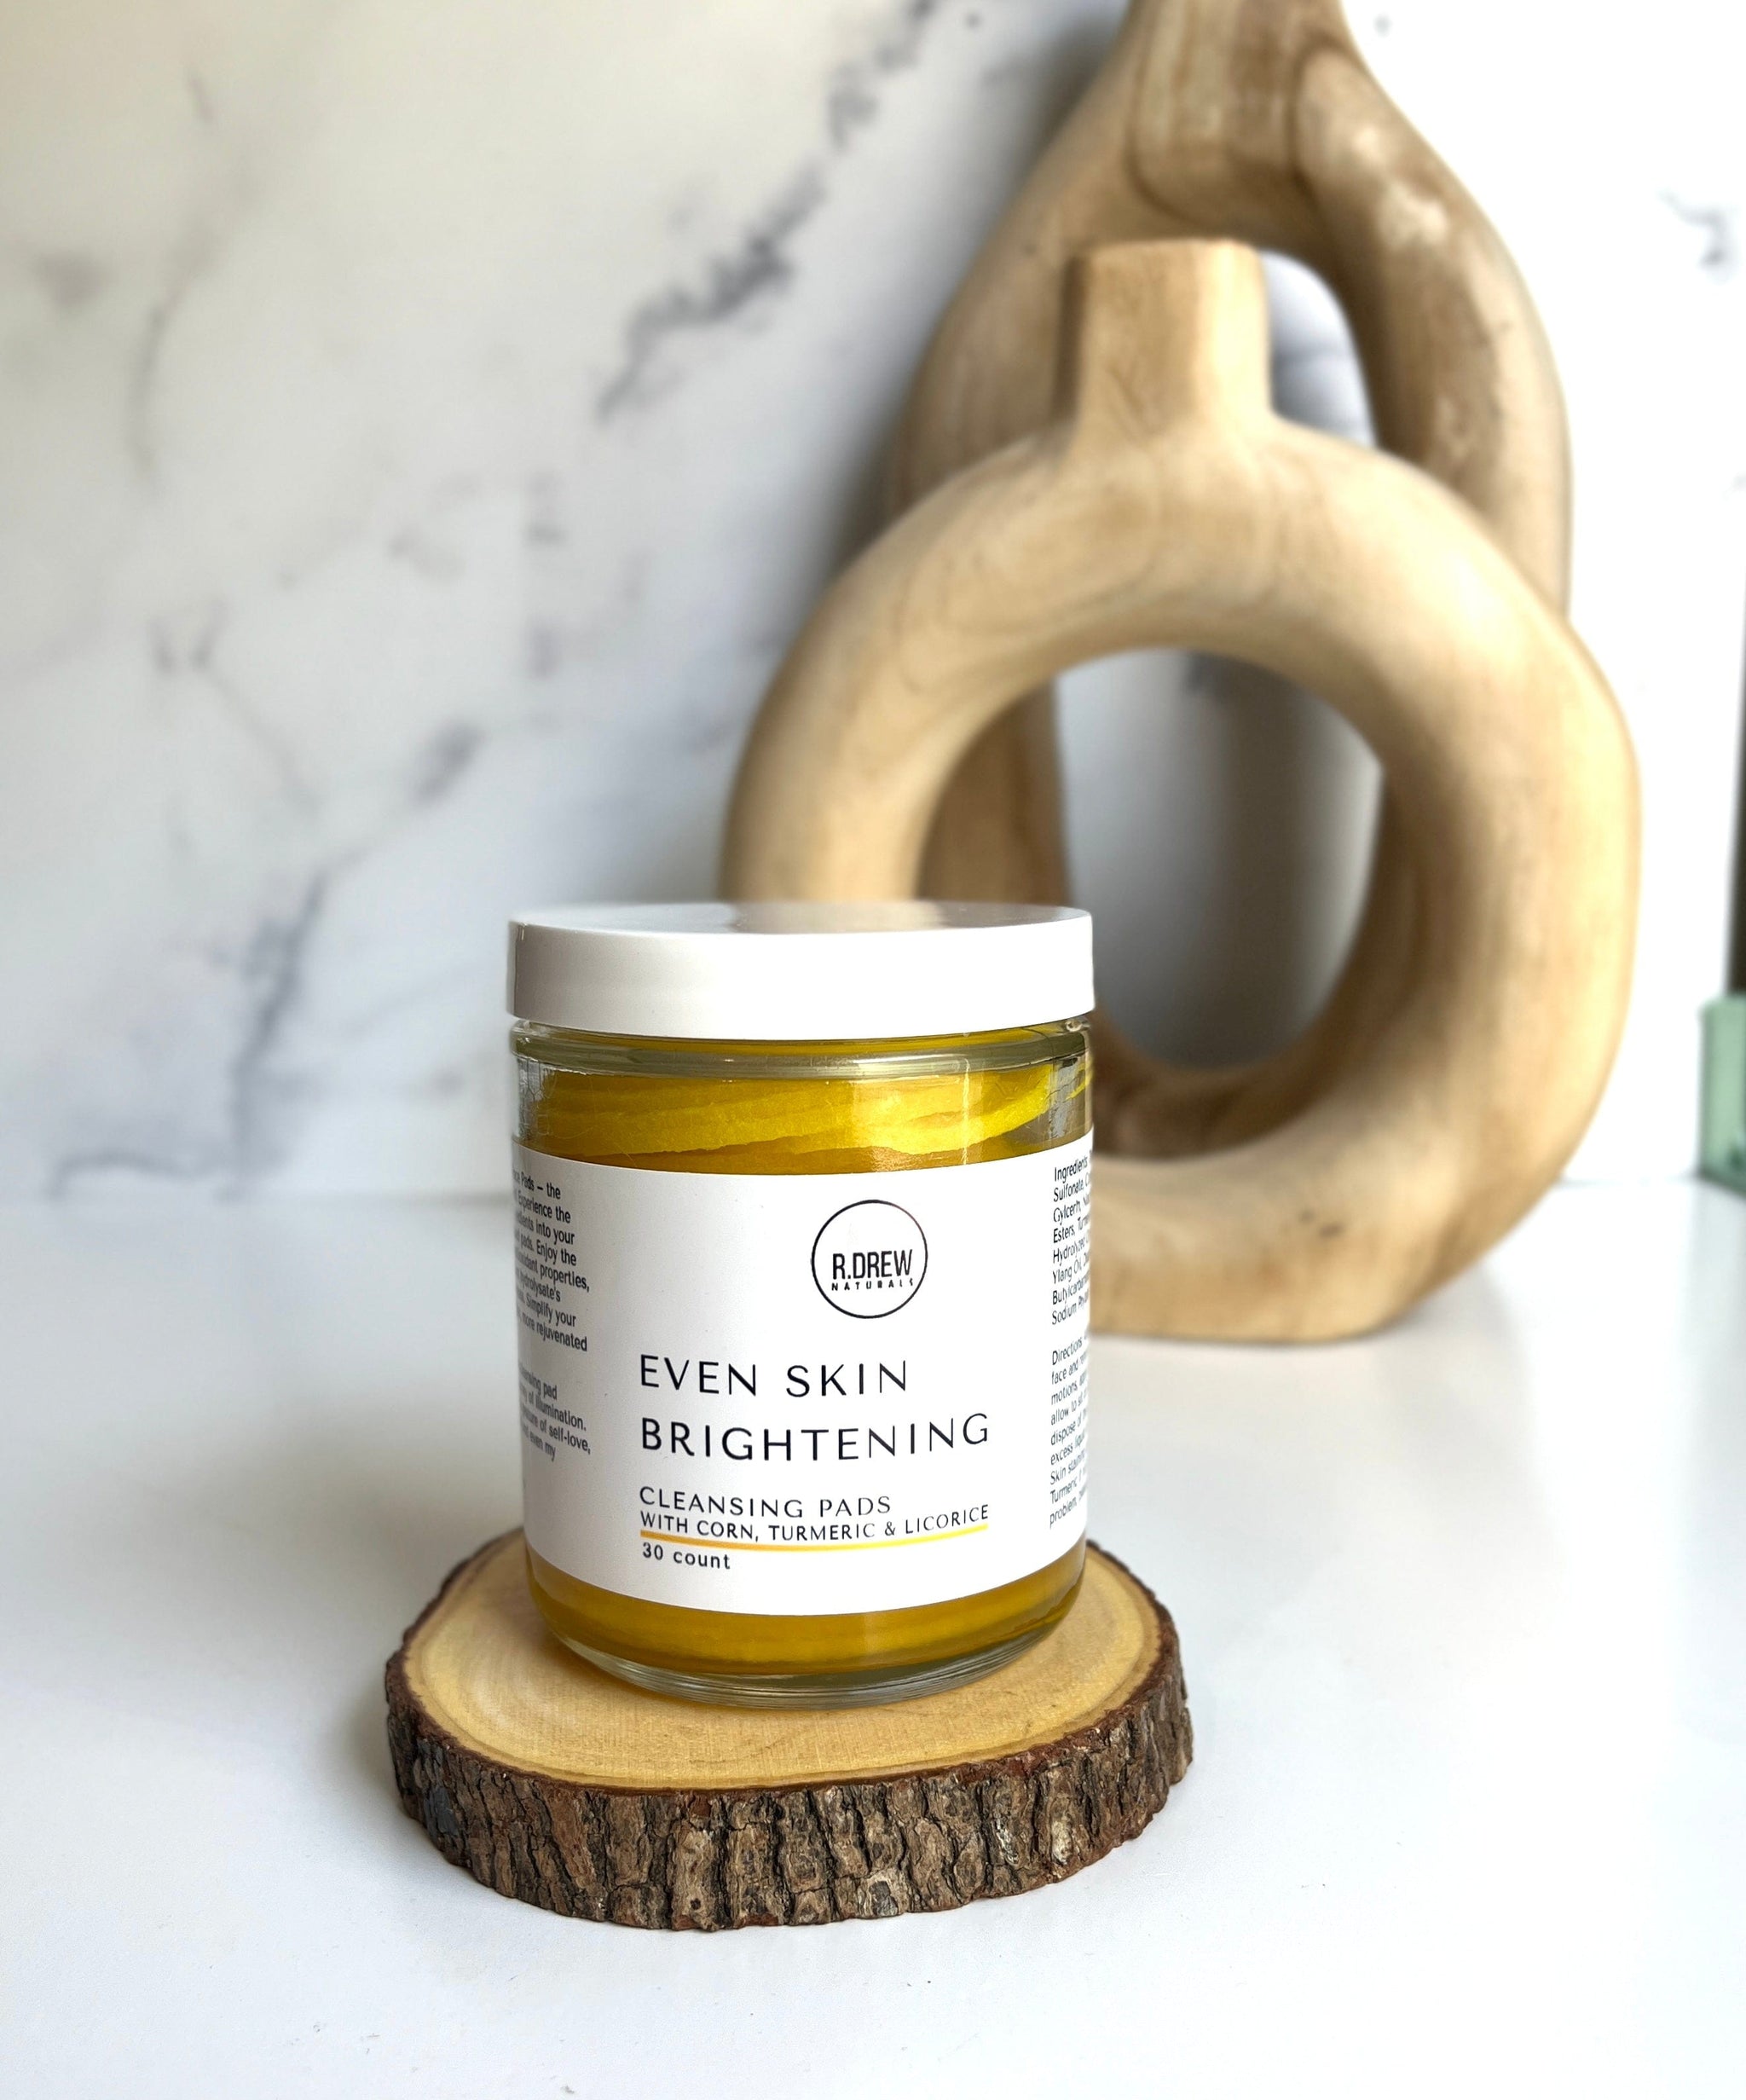
Soap Making
My soap making adventure started out as a way to make affordable, natural soaps that would relieve my husband, Richard’s, varied skin conditions. Little did I know at the time that it would turn into a full fledge business for us. The journey has been great and the rewards of running a business are even better. I still get excited when it is time to make a batch of soap just as I did when I made my first batch many, many years ago.
I don’t make soaps as frequently as I did in the past because I now make large batches that can last us for at least a month or sometimes two months. Therefore, I am making soaps at least once a month and let me just say that it is a busy day for me and hubby – making large batches per fragrance can bring on challenges. Any who, here is how things are set up prior to soaping, the process and the soap in the mold. Of course this picture gallery is of our most popular soap Tea Tree & Neem.
First we prep our area by placing contact paper down. This makes clean up easier and protects our work space. We also get all of our tools ready that will be used in the soap making process. The white bucket is what we use for soap making. It is a short, wide thick bucket and its size and shape make it easy to work with. The grey bucket is our lye that we buy 50# at a time now. We have come a long way, I remember when we were buy 1 – 3 containers at a time. God is GOOD!
I then put on my safety equipment – masks and full shield masks
Can’t forget the gloves, btw I wear special soaping clothes when soaping and my shirt is long sleeve
These are the essential oils used in our Tea Tree & Neem Soap. They are not yet weighed
This is water and lye weighed, the stage before they are mixed together.
All of our solid and liquid oils weighed
Neem Powder weighed and ready. We use both Neem Oil and Neem Powder in Tea Tree & Neem
Essential Oils weighed. I know it is alot, but this is a huge batch
We do the RTCP (room temperature cold process) method. And this is the stage when the hot lye is added to the room temp oils. We use the whisk to help distribute the lye so that it can melt the other hard oils.
As you can see the hard oils are melting nicely after several minutes
All melted
Neem Powder added after all oils are melted and we also add the essential oils at this point. If you can see it, the grey metal thingie that you see is the paint attachment to our drill. We use this to blend everything together.
Soap in the mold
All done – well until it is time to cut!


